
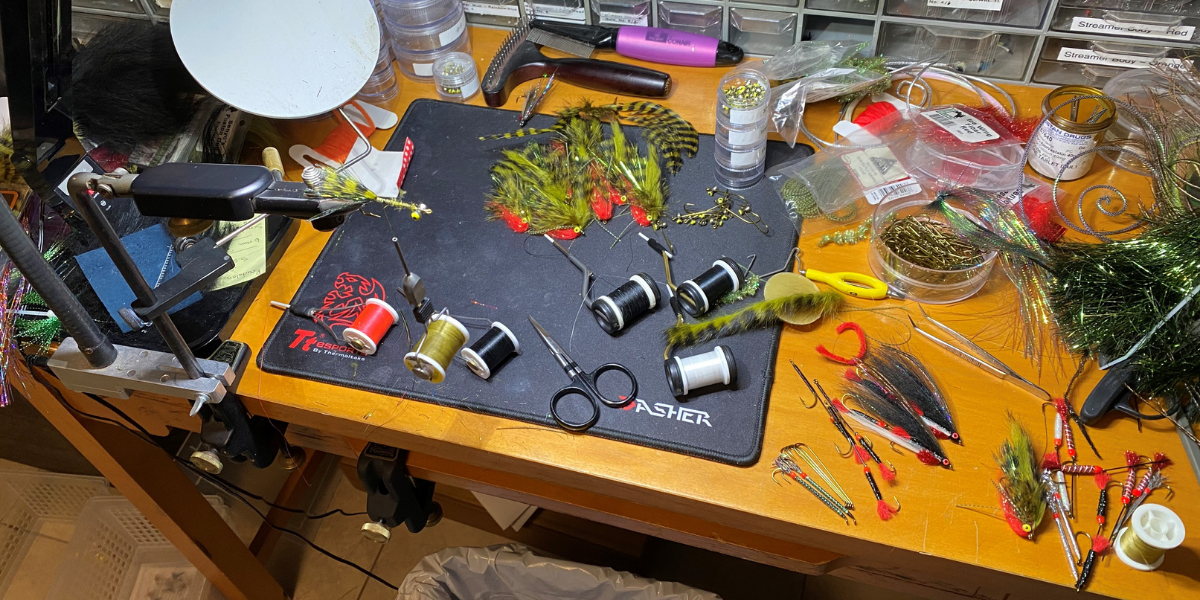
Beginner Fly Tying: What Basic Tools Do I Need to Start?
For many experienced fly fishermen, fly tying doesn’t begin with saving money or filling boxes faster. It begins with curiosity.
You’ve fished long enough to recognize good flies from mediocre ones. You notice proportions. You appreciate clean heads, durable materials, and flies that look intentional rather than rushed.
At some point, the natural question arises:
Should I start tying my own flies—and if so, what tools actually matter? What do I "actually" need to get started rather than what would I like to have!
This guide is written for anglers who already understand fishing, value quality equipment, and want to approach fly tying correctly from the beginning, without buying unnecessary clutter or cutting corners that lead to frustration later.
Fly tying, like fly fishing, rewards restraint, patience, and good tools. You don’t need everything—but what you do need should be chosen carefully.
My recommendation is to do some basic research and ask a fly tyer you trust. preferably someone who has been at it awhile and can give you honest feedback and insight.
You don't need much in tools to get started but what you do need is to make sure its "quality" gear. Doesn't have to be expensive although if your budget vs expectations are not aligned you can find yourself realizing that you purchased inferior tools that will only result in you giving up before you even get started.
A Mindset First: Tools Support Skill, Not the Other Way Around
Before listing tools, it’s worth clarifying one thing:
Fly tying is a craft, not a gadget race.
The goal of your first tying setup should not be to replicate a commercial bench or collect every possible accessory. Instead, your tools should:
- Encourage good habits
- Allow clean, controlled work
- Last long enough to grow with your skill
Buying cheap tools often leads to replacing them quickly. Buying overly specialized tools too early leads to confusion. The right approach sits comfortably in the middle: a small set of well-made, versatile tools.
That can be a little overwhelming given that your choices today seem endless. Unlike when I started the number of high quality options on the market are incredible. Even the brand name knockoffs can be an excellent choice if you are on a budget.
1. The Vise: Your Foundation
If there is one tool that defines your tying experience, it is the vise.
A vise does three things:
- Holds the hook securely
- Positions the fly at a comfortable working height
- Allows consistent access from all angles
What to Look For in a Beginner Vise (Who Values Quality)
For an experienced angler entering tying, look for:
- Solid hook-holding power across sizes you actually fish
- Rotary capability (true rotary is nice, but smooth rotation matters more)
- Stable base or strong clamp
- Machined metal parts, not plastic-heavy construction
You do not need:
- Multiple jaw sets
- Built-in lights
- Complex adjustments you don’t yet understand
A well-made mid-range vise will last decades and eliminate one of the most common beginner frustrations: slipping hooks.
My recommendation is "bare minimum" to purchase a vise that has rotary capability. You need to be able to easier see and access all aspects of your fly with a simple ability to easily rotate the fly effortlessly.
Living in the USA and interested in purchasing DcTackle Flies? Check out my Etsy Shop at My Etsy Store
All applicable duties and fees reflected in pricing to make purchasing simple. New patterns added weekly
2. Scissors: Precision Matters Immediately
Scissors are the first place poor tools show themselves.
You will use scissors constantly—for trimming thread, cutting hair, shaping wings, and cleaning heads. Dull or poorly aligned scissors make fly tying harder than it needs to be.
What to Prioritize
- Sharp, fine tips for precision
- Comfortable finger loops
- Good steel that holds an edge
Many tiers eventually keep multiple pairs:
- One for fine thread and feather work
- One for hair and synthetics
As a beginner, start with one excellent pair and treat them well.
My thoughts are to have at least 2 pairs of scissors. Your main pair with large loops and quality blades for the majority of your work and a second less expensive pair for cutting wire, lead, etc. that could dull or even ruin your expensive 'go to" pair.
3. Bobbin Holder: Control Over Thread Tension
The bobbin holder is often overlooked, yet it directly affects:
- Thread tension
- Smooth wraps
- Clean heads
A poor bobbin causes:
- Thread breakage
- Jerky tension changes
- Fatigue during longer sessions
What to Look For
- Ceramic or polished tube inserts
- Smooth tension adjustment
- Balanced feel in hand
A quality bobbin doesn’t just hold thread—it teaches you thread control, one of the most important skills in tying.
There is nothing more frustrating than a cheap bobbin that cuts your thread because of an inferior bobbin tube. Use the cheaper options for larger threads or flosses/yarns and purchase a quality option for your main tying
Trust you will end up purchasing more as you dedicate more of your time to the hobby!
4. Whip Finisher: Clean, Durable Fly Heads
You can finish flies by hand. Many do.
But a whip finisher:
- Creates consistent, clean knots
- Speeds up tying
- Improves durability
For beginners who value neat, professional results, learning to use a whip finisher early is worthwhile.
Tip
Choose a simple, traditional design. Fancy variations offer little advantage early on.
I prefeer the matarelli style with a rotating handle rather than the "thompson style" but thats just my preference.
5. Hackle Pliers: Small Tool, Big Help
Hackle pliers assist with:
- Wrapping hackle evenly
- Holding small or delicate materials
- Maintaining consistent tension
They’re especially helpful on:
- Dry flies
- Soft hackles
- Smaller patterns
Look for:
- Smooth jaws
- Comfortable grip
- Secure hold without crushing fibers
6. Bodkin or Dubbing Needle: Precision Work
This simple tool does a surprising amount of work:
- Applying head cement
- Picking out dubbing
- Clearing hook eyes
- Adjusting fibers
It’s inexpensive, but indispensable.
A bodkin is the one tool which can be inexpensive and yet finds a dedicated space on the fly tying bench. You always seem to be looking for it so keep it close and in easy reach
7. Lighting: The Tool Many Beginners Ignore
Good lighting improves:
- Accuracy
- Comfort
- Longevity at the bench
Poor lighting causes:
- Eye strain
- Mistakes
- Fatigue
What Works Well
- Adjustable lamp
- Neutral or daylight color temperature
- Positioned to reduce shadows on the hook
Good light helps you see proportion errors early—before they become habits.
From someone who has compromised eyesight trust me when I say a good lighting setup is a must. I currently have 3 different lamps which is overkill I know but it works for me. Spend some time on this one as a decent light is a "make or break" decision in my opinion.
I am currently sourcing a new light and when I make a choice I'll do a review and let you know my thoughts
8. Material Selection: Start Narrow, Not Wide
Materials are where many beginners overspend.
The temptation is understandable: fly shops and catalogs are full of beautiful feathers and exotic hair. But a disciplined start is far more rewarding.
A Smart Beginner Material Approach
- Choose 3–5 flies you actually fish
- Buy materials specifically for those patterns
- Favor versatile materials over rare ones
This keeps:
- Costs controlled
- Learning focused
- Storage manageable
Quality materials matter—but only when used intentionally.
9. Storage and Organization: Quietly Important
You don’t need a dedicated tying room.
But you do need:
- A clean surface
- Simple material organization
- Tools kept within easy reach
Order at the bench promotes order in your tying.
Key Note: Keep your materials separated and preferably in individual containers or sealed bags. This is especially true of natural materials or materials you procured yourself. It protects against bug infestations which can cause major headaches
Living in the USA and interested in purchasing DcTackle Flies? Check out my Etsy Shop at My Etsy Store
All applicable duties and fees reflected in pricing to make purchasing simple. New patterns added weekly
What You Don’t Need (Yet)
It’s just as important to know what not to buy early.
You can safely wait on:
- Advanced rotary accessories
- Dozens of specialty tools
- Large material collections
- Pattern-specific gimmicks
Fly tying rewards skill development, not equipment accumulation.
Quality vs Cost: A Familiar Conversation
As an experienced fly fisherman, you already understand this principle:
Buy once, cry once—if the tool truly matters.
A good vise, scissors, and bobbin will:
- Improve your learning curve
- Reduce frustration
- Stay relevant as your tying improves
Cheap tools don’t save money if they need replacing—or worse, discourage you from tying altogether.
Fly Tying as an Extension of Fly Fishing
Fly tying isn’t a replacement for fishing.
It’s an extension of it.
It deepens your understanding of:
- Fly design
- Material behavior
- Proportion and balance
And for anglers who already appreciate high-quality flies, tying becomes less about production and more about intentional creation.
A Simple Starter Tool List (Quality-Focused)
If you want a clean, minimal starting setup:
- Solid mid-range vise
- One excellent pair of scissors
- Quality bobbin holder
- General-purpose thread
- Whip finisher
- Hackle pliers
- Bodkin
- Good lighting
That’s it.
Everything else can wait.
Final Thoughts
Starting fly tying doesn’t require a leap—it requires a thoughtful step.
Approached with the same discernment you apply to rods, reels, and flies, fly tying becomes:
- Enjoyable
- Sustainable
- Deeply satisfying
The right tools won’t make you a great tier overnight. But they will remove obstacles, allowing skill, patience, and taste to develop naturally.
And that, much like fly fishing itself, is where the real reward lies.
Get new fly recipes, fishing reports, and exclusive offers delivered right to your inbox
.png)


